
Wafer Pencil Cookies ⭐️⭐️⭐️⭐️⭐️ (4.9 from 1,500 happy bakers)
📸 500+ super cute photo shares | 🎒 Updated June 2025
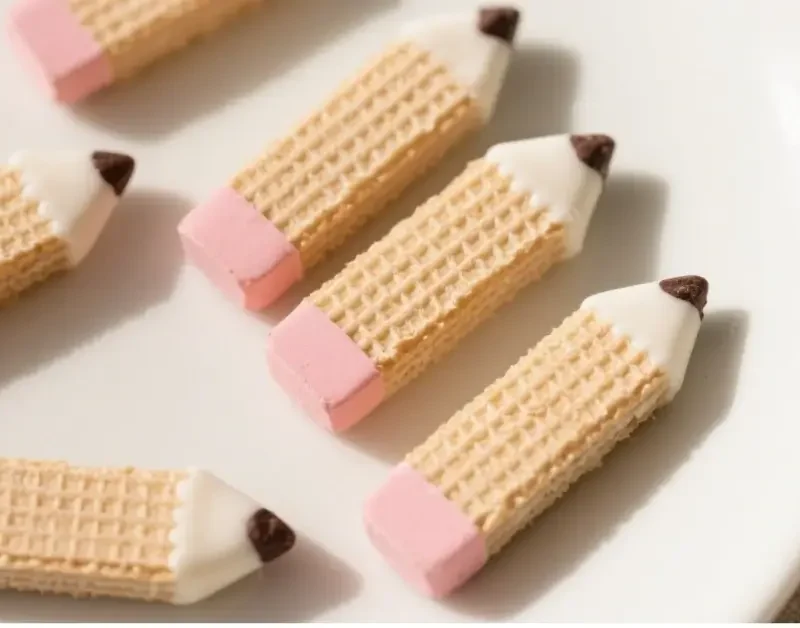
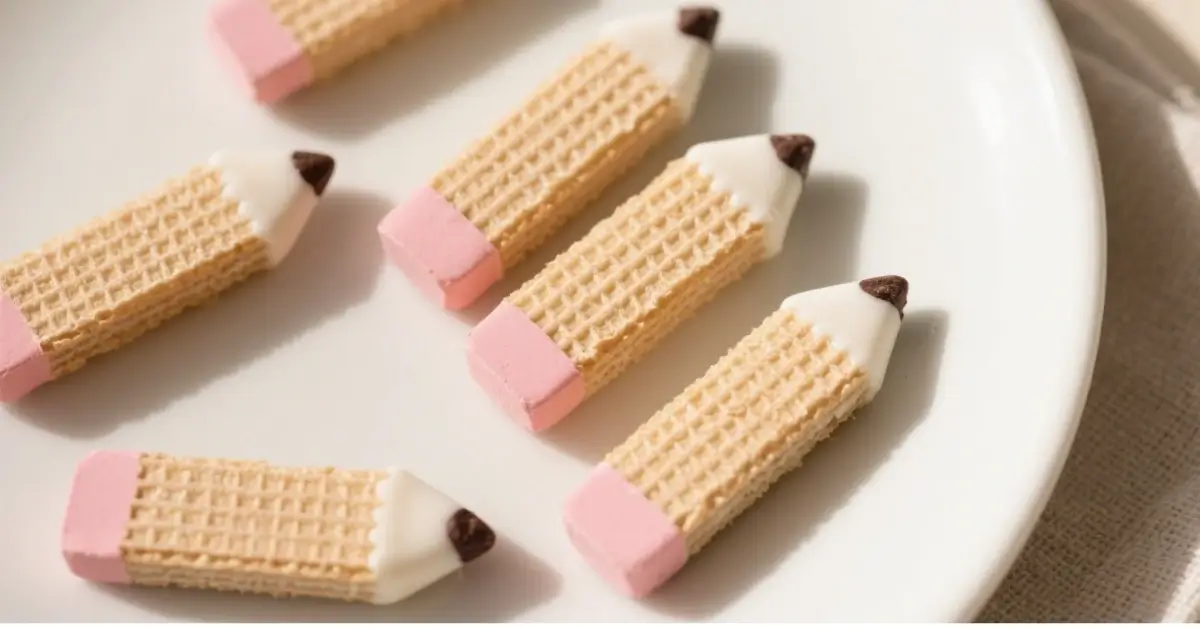
Whether you’re surprising the kids, thanking teachers, or adding a creative touch to a lunchbox, these Cute Wafer Pencil Cookies are the sweetest way to kick off the school year. With no baking required, they’re quick, fun to decorate, and almost too adorable to eat (almost!). They’re the perfect back-to-school treat to make together and share.
📌 Quick Glance – Wafer Pencil Cookies
- ⏱️ Prep Time: 20 minutes
- 🍽️ Servings: About 24 pencils
- 💥 Vibe: Cute, fun, school-themed
⬇️ Jump Ahead
- What You’ll Need
- How to Make Cute Wafer Pencil Cookies
- Fun Decorating Ideas & Tips
- Reviews from Happy Snackers
- FAQ – Your Pencil Cookie Questions Answered
🛒 What You’ll Need – Simple, Playful Ingredients
- 1 package of vanilla wafer cookies (long rectangular shape)
- Pink candy melts (for erasers)
- Black or dark brown candy melts or chocolate (for pencil tips)
- White candy melts (optional, for sharpening detail)
- Mini chocolate chips (optional for tip detail)

👩🍳 How to Make Cute Wafer Pencil Cookies
Prepare Melts: Melt pink and black (or dark brown) candy melts in separate bowls according to package directions.
Shape the Tips: Cut one end of each wafer cookie into a point using a sharp knife to create a pencil tip shape.
Dip the Erasers: Dip the flat end of each cookie into melted pink candy to create the eraser. Let set on parchment paper.
Dip the Tips: Dip the pointed end into melted dark candy or chocolate to create the pencil tip. If using, add a mini chocolate chip at the very tip for extra detail.
Optional Detail: Use white candy melts to add a “wood” detail where the tip meets the wafer for an extra realistic touch.
Let Set: Place on parchment paper and allow candy melts to harden completely before serving.
✨ Fun Decorating Ideas & Tips
Add thin lines with edible markers or icing to make them look like pencil grooves.
Attach a small gift tag or thank-you note to make them extra special for teachers.
Make a batch in different “colors” using different candy melts to look like colored pencils.
Package them in clear treat bags with ribbons for a cute gift.
📝 Cute Wafer Pencil Cookies — Back To School Treat
Ingredients
Equipment
Method
- Use a sharp knife to carefully cut one end of each wafer into a point to resemble a pencil tip.
- Melt pink candy melts according to package instructions.
- Dip the flat (uncut) end of each wafer into the pink candy melts to create the “eraser.” Place on parchment paper to set.
- Melt white candy melts.
- Dip the pointed ends of each wafer into the white candy melts to create the “wood” part of the pencil.
- While still wet, place a mini chocolate chip on the tip as the “lead.” Let set.
- If desired, drizzle or brush melted yellow candy melts over the middle of the wafers to make them look like classic yellow pencils.
- Allow all parts to set completely before serving or packaging. Enjoy!
Notes
💬 Reviews from Happy Wafer Pencil Cookies Fan
“The cutest thing I’ve ever made! My daughter was so excited to share these with her classmates.” – ⭐️⭐️⭐️⭐️⭐️ Amanda K.
“Perfect for teacher gifts and so easy to make with the kids.” – ⭐️⭐️⭐️⭐️⭐️ Sarah L.
“They turned out adorable and everyone at our back-to-school night loved them!” – ⭐️⭐️⭐️⭐️⭐️ Jessie P.
❓ FAQ – Your Pencil Cookie Questions Answered
Want to make your back-to-school treat table even more fun? Pair these adorable wafer pencil cookies with a sweet and fizzy Italian Cream Soda. The colorful drink is just as playful as the cookies — and both kids and adults will love them!